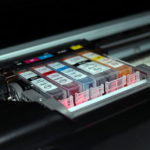
Dye printing. (Image credit: Pixabay, user:Pujadm)
Silk-screening has become trendier with the popularity of graphic tees and computer design programs. It is easier than ever to design your own t-shirt. You do not have to own a fashion company, and you might be surprised at how well it will turn out. Here are a few tips for successful silk-screening.
Design in the Program
Several different programs allow you to design graphic images. The most common programs people use are Adobe Illustrator and Photoshop although some people also use Corel Draw. If you want to silk-screen onto a t-shirt, you will probably need a vector file because vector images can handle scaling without any problems.
Print and Screen in Layers
When you print and screen a t-shirt, you have to use multiple layers. Each layer represents a color in your design. If you are new to the process, it is best to use one color. Once you get more familiar with the process, you can expand to multiple layers and different colors.
Light and Heat
Light and heat play a major role in the silk-screening process. UV light will transfer a printed design to a screen while weat will cure the design on the t-shirt so that it doesn’t bleed or wash off.
Silk-screening is for anyone. You can design something simple or complex. It is a fun way to transfer your own designs to your clothing. You can refer to the infographic below for a more detailed information about this process:


Great Tips. I love your SILK screening tips. I really impressed with your creativity. Silk screen printing look very easy by following your steps. I am so excited to try this. Thanks for sharing.